Step 1: Introduction
In this tutorial we will be working on a very awesome typing game flash using this very useful Combo Detection class. It is very recommended that you read that tutorial before continuing here, so that you understand what that class will be doing during our game.In our game, we will have many blocks with letters on the screen, and the player has to type a word formed with the letter blocks. If that word is valid, the blocks are removed and the player gets points and more time to play. The game will end when the time reaches zero.
If you plan on completely following this tutorial, you should grab the source files.
Step 2: Adding the Images in Flash Professional
As it was done in the previously mentioned tutorial, we will add the all the images for our game in a Flash Professional .fla file, then generate a .swc file, which will be added into our FlashDevelop project for use.For this tutorial, we will need a background image (thanks for Petr Kovar for the awesome wood background!), a generic block image with a selected frame and the currently typed keys box. You can find everything set up in our source files.


Step 3: The LetterBlock
Before we can begin working on our code, let’s set up our FlashDevelop project. This one is going to be an AS3 Project with Preloader, so select that option on FlashDevelop! Assuming that you have read the combos tutorial, you probably know how to add a .swc file to FlashDevelop’s library. If you don’t, just right-click it and select “Add to library”. Grab the .swc file from the source and add it. That’s it. Time for action!Our letter block will be a simple object with a TextField in it and the block image shown in Step 2. Coding that is simple. Create the
LetterBlock class:Lines 21-28 create the text field to hold our letter text, as well as position it on the screen and give it a font, font color and size. The
package{importArtAssets.LetterBlockImage;importflash.display.MovieClip;importflash.display.Sprite;importflash.text.TextField;importflash.text.TextFormat;importflash.text.TextFormatAlign;publicclassLetterBlockextendsSprite{privatevar_image:MovieClip;privatevar_letterText:TextField;publicfunctionLetterBlock(){_image =newLetterBlockImage();_image.stop();_letterText =newTextField();_letterText.defaultTextFormat =newTextFormat("Verdana",40,0xFFFFFF,true,null,null,null,null, TextFormatAlign.CENTER);_letterText.width =60;_letterText.x = -30;_letterText.y = -26.3;_letterText.selectable =false;_letterText.multiline =false;addChild(_image);addChild(_letterText);}publicfunctionsetLetter(letter:String):void{_letterText.text = letter;}}}
setLetter function is only used to set the letter of the box.Step 4: Loading up the Words
Every typing game needs words to work with. In this step, we will load an external file through the[Embed] tag and work with the data of the file. Obviously, this file contains words to be used in our game. It is available in the source files. Also, in this step we begin to work with the ComboHandler class, so add it in your FlashDevelop project as well!Let’s look at some code:
In Main.as:
Line 5 above initializes the
privatefunctioninit(e:Event =null):void{removeEventListener(Event.ADDED_TO_STAGE, init);ComboHandler.initialize(stage);DictionaryWords.loadWords();}
ComboHandler, as required, and line 7 calls the loadWords() method from the DictionaryWords class. This class will be created by us, and its code is right below:Line 5 is the line that loads the external file and put it in the game at compile-time. This is all possible because of the
package{publicclassDictionaryWords{[Embed(source ="../src/Words.txt", mimeType ="application/octet-stream")]privatestaticvar_Words:Class;publicstaticfunctionloadWords():void{varwords:String=new_Words();varwordsArray:Array= words.split("\n");vari:int;varlength:int= wordsArray.length;for(i =0; i < length; i++){ComboHandler.registerCombo(wordsArray[i], turnIntoLetters(wordsArray[i]));}}privatestaticfunctionturnIntoLetters(word:String):Array{varletters:Array= word.split("");if(letters[0] ==""){letters.shift();}if(letters[letters.length -1] ==""){letters.pop();}vari:int;for(i =0; i < letters.length; i++){letters[i] =String(letters[i]).charCodeAt(0);}returnletters;}}}
[Embed] tag. If you want more information about it, I recommend this great article on Adobe Livedocs.Here is a section of Words.txt, so you can see what we’re working with:
Line 12 (of DictionaryWords.as) is a very important line. Basically, it turns all the words from Words.txt, which were stored in a
ABBREVIATORABCABCOULOMBABCSABDIASABDICABLEABDICATEABDICATIONABDICATORABDOMENABDOMINALABDOMINOCENTESISABDOMINOPLASTY
String, to elements in an Array. Since each word is separated by a newline character, all we had to do was call the split() method of the String class.The
turnIntoLetters function just turns a word into an Array with the key codes of each letter. That way, our ComboHandler class can work with it.Step 5: Adding Letter Blocks to the Screen
Now that we have our words ready in the game, it is time to begin working on putting the letters on the screen. This is very simple. First of all, we need a game screen. TheGameScreen class will contain all the logic of our game.The
package{importArtAssets.BackgroundImage;importflash.display.Sprite;importadobe.utils.CustomActions;publicclassGameScreenextendsSprite{privatevar_background:BackgroundImage;privatevar_blocksOnScreen:Vector.<LetterBlock>;publicfunctionGameScreen(){_background =newBackgroundImage();_background.x =275;_background.y =200;addChild(_background);_blocksOnScreen =newVector.<LetterBlock>();populateBlocks();}privatefunctionpopulateBlocks():void{vari:int;vartempBlock:LetterBlock;for(i =0; i <8; i++){tempBlock =newLetterBlock();tempBlock.x =130+ ((i %4) *95);tempBlock.y =80+int(i /4) *80;tempBlock.setLetter(randomLetter());addChild(tempBlock);_blocksOnScreen.push(tempBlock);tempBlock =null;}}privatefunctionrandomLetter():String{returnString.fromCharCode((int(Math.random() *26) +65));}}}
_blocksOnScreen Vector is the main element in this code: it will contain all the blocks on the screen, allowing us to work with them anytime we want. Note that in Line 14 we add the BackgroundImage on the screen, which is a graphic from the .swc file.Inside the
populateBlocks() function, all that we do is add a new LetterBlock at a certain position, give it a random letter (which is generated by the randomLetter() function) and add it to the screen.Now, we need to add the game screen in
Main‘s child. Inside Main.as:Compile the project and you will be able to see the blocks on the screen!
privatevar_gameScreen:GameScreen;privatefunctioninit(e:Event =null):void{removeEventListener(Event.ADDED_TO_STAGE, init);ComboHandler.initialize(stage);DictionaryWords.loadWords();_gameScreen =newGameScreen();addChild(_gameScreen);}
Step 6: Selecting a Block After a Key Press
In our game, we want the block to go to its “Selected” image when its corresponding key has been pressed. This is very easy to do. Go to the LetterBlock.as file and add this code:The
privatevar_selected:Boolean;publicfunctionselect():void{_selected = !_selected;_image.gotoAndStop(_selected ==true?"Selected":"Unselected");}publicfunctiongetletter():String{return_letterText.text;}publicfunctiongetselected():Boolean{return_selected;}
_selected variable will be used on the game’s logic to check whether a block is selected or not. The same happens with letter.All that is left is to make the block switch between “selected” and “unselected” now. Inside GameScreen.as:
Given that we should add our
importflash.events.Event;importflash.events.KeyboardEvent;// ** snip **publicfunctionGameScreen(){_background =newBackgroundImage();_background.x =275;_background.y =200;addChild(_background);_blocksOnScreen =newVector.<LetterBlock>();populateBlocks();addEventListener(Event.ADDED_TO_STAGE, onStage);}privatefunctiononStage(e:Event):void{removeEventListener(Event.ADDED_TO_STAGE, onStage);stage.addEventListener(KeyboardEvent.KEY_DOWN, onKeyDown);}privatefunctiononKeyDown(e:KeyboardEvent):void{vari:int;for(i =0; i < _blocksOnScreen.length; i++){if(_blocksOnScreen[i].letter ==String.fromCharCode(e.keyCode) && !_blocksOnScreen[i].selected){_blocksOnScreen[i].select();break;}}}
KeyboardEvent listeners to the stage, in the GameScreen‘s constructor, we add a listener for Event.ADDED_TO_STAGE, which will lead us to the onStage() function. This function adds the listener to the stage. The onKeyDown() function is responsible for going over all our blocks on the screen and verifying if there is any block with the letter pressed. If so, then we should select it, which is done in line 36.After compiling the project, this is what we get:
Step 7: Modifications to the ComboHandler Class
In order for our game to work the way we want, we’ll need to do a few modifications to theComboHandler class from the previous tutorial. The first modification is to make it able to only check for a combo when the user has stopped typing. This will be detected with the MAX_INTERVAL constant and through an update() function. Also, since the user has to type the exact word letters in order to “complete” it, we will change how we are checking if a combo matches the keys inside the pressedKeys Array. The last modification is to send an event even when the word typed is wrong. This will allow our game to detect the player’s mistake and penalise him for that.All the code below does what was explained:
Inside ComboHandler.as:
We changed our ComboHandler’s constructor declaration to allow us check for combos only after the user has stopped typing. This is verified in the
privatestaticconstMAX_INTERVAL:int=500;// MillisecondsprivatestaticvarcheckComboAfterClearing:Boolean;publicstaticfunctioninitialize(stageReference:Stage, checkComboAfterClearing:Boolean=false):void{combos =newDictionary();interval =0;dispatcher =newEventDispatcher();ComboHandler.checkComboAfterClearing = checkComboAfterClearing;pressedKeys = [];stageReference.addEventListener(KeyboardEvent.KEY_DOWN, onKeyDown);}privatestaticfunctiononKeyDown(e:KeyboardEvent):void{if(getTimer() - interval > MAX_INTERVAL){pressedKeys = [];}interval = getTimer();pressedKeys.push(e.keyCode);if(!checkComboAfterClearing){checkForCombo();}}publicstaticfunctionupdate():void{if(getTimer() - interval > MAX_INTERVAL){checkForCombo();pressedKeys = [];}}privatestaticfunctioncheckForCombo():void{if(pressedKeys.length ==0){return;}vari:int;varcomboFound:String="";for(varcomboName:Stringincombos){if((combos[comboName]asArray).length ==0){continue;}if(pressedKeys.join(" ") == (combos[comboName]asArray).join(" ")){comboFound = comboName;break;}}// Combo Found//if (comboFound != "")//{//pressedKeys = [];dispatcher.dispatchEvent(newComboEvent(ComboEvent.COMBO_FINISHED, {comboName: comboFound} ));//}}
update() function, using the MAX_INTERVAL constant. Also, the checkForCombo() function has been modified to use a more suitable combo checking.Now, we also must change the
GameScreen class to update the ComboHandler class:The update is being done through an
publicfunctionGameScreen(){_background =newBackgroundImage();_background.x =275;_background.y =200;addChild(_background);_blocksOnScreen =newVector.<LetterBlock>();populateBlocks();addEventListener(Event.ADDED_TO_STAGE, onStage);addEventListener(Event.ENTER_FRAME, gameLoop);}privatefunctiongameLoop(e:Event):void{ComboHandler.update();}
Event.ENTER_FRAME event listener, since it’s a simple and good approach.The last modification is to change how we initialize the
ComboHandler class inside the Main class:By compiling the game, this is what we get:
privatefunctioninit(e:Event =null):void{removeEventListener(Event.ADDED_TO_STAGE, init);ComboHandler.initialize(stage,true);DictionaryWords.loadWords();_gameScreen =newGameScreen();addChild(_gameScreen);}
Step 8: Adding the Word Box
It’s time to give the player something else to rely on. Right now, the player can’t see the sequence of letters that was already typed, so let’s add a word box in the game. This box will contain the currently typed letters, organized by order, and will be cleaned when a combo event has been received. Create theWordBox class and add this code to it:This class is almost the same as the
package{importArtAssets.TypedLettersBoxImage;importflash.display.Sprite;importflash.text.TextField;importflash.text.TextFormat;importflash.text.TextFormatAlign;publicclassWordBoxextendsSprite{privatevar_image:Sprite;privatevar_textField:TextField;publicfunctionWordBox(){_image =newTypedLettersBoxImage();_textField =newTextField();_textField.defaultTextFormat =newTextFormat("Verdana",30,0xFFFFFF,true,null,null,null,null, TextFormatAlign.CENTER);_textField.width =500;_textField.x = -250;_textField.y = -25;_textField.selectable =false;_textField.multiline =false;_textField.text ="";addChild(_image);addChild(_textField);}publicfunctionaddLetter(letter:String):void{_textField.appendText(letter);}publicfunctionclear():void{_textField.text ="";}}}
LetterBlock class, so no extensive explanation is necessary. The only thing that deserves attention is line 35, which contains a call to the appendText() method from the String class. This function will add text to the end of the current text, allowing us to display the typed letters always at the end of the current text from the word box.Now, it’s time to add the word box in the game. Go to GameScreen.as and add this code:
Lines 1, 15-17 and 19 create the word box and put it on the screen. Line 36 calls the
privatevar_wordBox:WordBox;publicfunctionGameScreen(){_background =newBackgroundImage();_background.x =275;_background.y =200;addChild(_background);_blocksOnScreen =newVector.<LetterBlock>();populateBlocks();_wordBox =newWordBox();_wordBox.x =275;_wordBox.y =350;addChild(_wordBox);addEventListener(Event.ADDED_TO_STAGE, onStage);addEventListener(Event.ENTER_FRAME, gameLoop);}privatefunctiononKeyDown(e:KeyboardEvent):void{vari:int;for(i =0; i < _blocksOnScreen.length; i++){if(_blocksOnScreen[i].letter ==String.fromCharCode(e.keyCode) && !_blocksOnScreen[i].selected){_blocksOnScreen[i].select();_wordBox.addLetter(_blocksOnScreen[i].letter);break;}}}
addLetter() function to add a letter in the box.The result of this step is below. We will add the code to clear the word box in the next step.
Step 9: Integrating our ComboHandler With our GameScreen
Right now, the only changes that have been done in theComboHandler only modified when and how to check for combos. This is the part where it gets fun: we will integrate our ComboHandler in the game. This means our ComboHandler will depend on GameScreen in order to run. Let’s jump to the code, and see explanations after it!Inside GameScreen.as:
Inside
publicfunctionGameScreen(){_background =newBackgroundImage();_background.x =275;_background.y =200;addChild(_background);_blocksOnScreen =newVector.<LetterBlock>(8);populateBlocks();_wordBox =newWordBox();_wordBox.x =275;_wordBox.y =350;addChild(_wordBox);addEventListener(Event.ADDED_TO_STAGE, onStage);addEventListener(Event.ENTER_FRAME, gameLoop);ComboHandler.dispatcher.addEventListener(ComboEvent.COMBO_FINISHED, onWordFinished);ComboHandler.setGameInstance(this);}privatefunctiononWordFinished(e:ComboEvent):void{_wordBox.clear();}publicfunctionisKeyAvailable(key:String):Boolean{vari:int;for(i =0; i < _blocksOnScreen.length; i++){if(_blocksOnScreen[i].letter == key && !_blocksOnScreen[i].selected){returntrue;}}returnfalse;}privatefunctionpopulateBlocks():void{vari:int;vartempBlock:LetterBlock;for(i =0; i <8; i++){tempBlock =newLetterBlock();tempBlock.x =130+ ((i %4) *95);tempBlock.y =80+int(i /4) *80;tempBlock.setLetter(randomLetter());addChild(tempBlock);_blocksOnScreen[i] = tempBlock;tempBlock =null;}}
GameScreen‘s constructor, we added an event listener to ComboHandler‘s dispatcher object, and called the setGameInstance() function of that class (which will be added below). This will give the current instance of the game screen to the ComboHandler class, and will clear the word box.There’s also an
isKeyAvailable function created. This will be called within the combo handler to verify if it can add a key to the list of pressed keys.Line 63 is just a fix to the change done in
_blocksInScreen in the constructor.Take a look at the code to add inside ComboHandler.as:
In the highlighted line we add a call to
privatestaticvargameInstance:GameScreen;publicstaticfunctionsetGameInstance(gameInstance:GameScreen):void{ComboHandler.gameInstance = gameInstance;}privatestaticfunctiononKeyDown(e:KeyboardEvent):void{if(getTimer() - interval > MAX_INTERVAL){pressedKeys = [];}if(gameInstance.isKeyAvailable(String.fromCharCode(e.keyCode))){interval = getTimer();pressedKeys.push(e.keyCode);}if(!checkComboAfterClearing){checkForCombo();}}
isKeyAvailable(), which is in the game screen instance stored in the ComboHandler class. This is the end of the integration between the game and the combo handler.After compiling, you will notice that the game now clears the word box after the interval has passed:
Step 10: Act When a Word has Been Typed
In this step, we will make the game take some action when a word has been detected. First of all, we need to know when a word has been detected. Let’s find out how:Inside GameScreen.as:
In line 23 there is an event listener for
publicfunctionGameScreen(){_background =newBackgroundImage();_background.x =275;_background.y =200;addChild(_background);_blocksOnScreen =newVector.<LetterBlock>(8);populateBlocks();_wordBox =newWordBox();_wordBox.x =275;_wordBox.y =350;addChild(_wordBox);addEventListener(Event.ADDED_TO_STAGE, onStage);addEventListener(Event.ENTER_FRAME, gameLoop);ComboHandler.dispatcher.addEventListener(ComboEvent.COMBO_FINISHED, onWordFinished);ComboHandler.setGameInstance(this);}privatefunctiononWordFinished(e:ComboEvent):void{if(e.params.comboName !=""){removeSelectedLetters();populateBlocks();_wordBox.clear();}}privatefunctionremoveSelectedLetters():void{vari:int;for(i =0; i <8; i++){if(_blocksOnScreen[i].selected){removeChild(_blocksOnScreen[i]);_blocksOnScreen[i] =null;}}}privatefunctionpopulateBlocks():void{vari:int;vartempBlock:LetterBlock;for(i =0; i <8; i++){if(_blocksOnScreen[i] ==null){tempBlock =newLetterBlock();tempBlock.x =130+ ((i %4) *95);tempBlock.y =80+int(i /4) *80;tempBlock.setLetter(randomLetter());addChild(tempBlock);_blocksOnScreen[i] = tempBlock;}tempBlock =null;}}
ComboEvent.COMBO_FINISHED. This event will be fired every time a word has been formed or when the player has missed. If you go back to ComboHandler.as, you will notice that when the player misses, the name of the combo within the fired event will be null, or “”. Due to that, we do the check in lines 28-34. The removeSelectedLetters() function will remove all selected letters, since the player has formed a word when it is called. We also changed the populateBlocks() function to only put a new block in places where there is no block – this fits what we are doing inside the function to remove blocks.Compile the game and this is the result:
Step 11: Do Something When the Player Types a Wrong Word
Have you got any idea of what to do when a player misses a word? I was thinking of taking away time and score from the player (this will be done in later steps), as well as giving a 30% chance of modifying a selected letter from the misstyped word. The code below does exactly the latter. Move to GameScreen.as:Before looking at lines 5 and 9, let’s jump to line 25: in this line,
privatefunctiononWordFinished(e:ComboEvent):void{if(e.params.comboName !=""){removeSelectedLetters(false);}else{removeSelectedLetters(true);}populateBlocks();_wordBox.clear();}privatefunctionremoveSelectedLetters(wasFromFailure:Boolean):void{vari:int;for(i =0; i <8; i++){if(_blocksOnScreen[i].selected){if((wasFromFailure && Math.random() <0.3) || !wasFromFailure){removeChild(_blocksOnScreen[i]);_blocksOnScreen[i] =null;}else{_blocksOnScreen[i].select();}}}}
wasFromFailure is the variable that will define whether the game should “calculate” a 30% chance (through Math.random()) or just replace the block. And how is this value passed? Look at lines 5 and 9: if the name of the word is nothing, or “”, that means the player has missed the word, which means we should pass true to removeSelectedLetters().Compile the project and try to type a wrong word!
Step 12: Add a Score
It is now time to add a score in the game! First, we will create the image and place it on the screen. In the next step, we will give score to the player. For the score, we need to create aScore class, and this is the code for it:I believe there is not much to say about it – we have already done text like this two times before. Now we should add this score on the screen. Inside GameScreen.as:
package{importflash.display.Sprite;importflash.text.TextField;importflash.text.TextFormat;importflash.text.TextFormatAlign;publicclassScoreextendsSprite{privatevar_text:TextField;privatevar_score:int;publicfunctionScore(){_text =newTextField();_text.defaultTextFormat =newTextFormat("Verdana",40,0xFFFFFF,true,null,null,null,null, TextFormatAlign.CENTER);_text.width =500;_text.selectable =false;_text.multiline =false;addChild(_text);_score =0;_text.text ="Score: "+ _score.toString();}publicfunctionaddToScore(value:int):void{_score += value;_text.text ="Score: "+ _score.toString();}}}
There you go. Compile the project and you can now see the score!
privatevar_score:Score;publicfunctionGameScreen(){_background =newBackgroundImage();_background.x =275;_background.y =200;addChild(_background);_blocksOnScreen =newVector.<LetterBlock>(8);populateBlocks();_wordBox =newWordBox();_wordBox.x =275;_wordBox.y =350;addChild(_wordBox);_score =newScore();_score.x =25;_score.y =210;addChild(_score);addEventListener(Event.ADDED_TO_STAGE, onStage);addEventListener(Event.ENTER_FRAME, gameLoop);ComboHandler.dispatcher.addEventListener(ComboEvent.COMBO_FINISHED, onWordFinished);ComboHandler.setGameInstance(this);}
Step 13: Give and Take Score
Now that the score is already added on the screen, all we have to do is give score to the player when he completes a word, and take away score when he misses it. The code in GameScreen.as:As you can see, it is very simple: we give 30 times the number of letters of a word to the player, and take away 10 times the number of letters of the mistyped word. The compiled game is below for testing!
privatefunctionremoveSelectedLetters(wasFromFailure:Boolean):void{vari:int;varcount:int=0;for(i =0; i <8; i++){if(_blocksOnScreen[i].selected){count++;if((wasFromFailure && Math.random() <0.3) || !wasFromFailure){removeChild(_blocksOnScreen[i]);_blocksOnScreen[i] =null;}else{_blocksOnScreen[i].select();}}}if(wasFromFailure){_score.addToScore( -(count *10));}else{_score.addToScore(count *30);}}
Step 14: Add a Timer
Adding a timer will be almost the same thing as the score. There will be only one difference: we will need to be constantly updating the timer, and the timer will have a different text. Take a look at the code for Timer.as below:As you may have noticed in lines 33, 35 and 37, we are creating a different text for timer. It will consist of minutes and seconds. For that to work,
package{importflash.display.Sprite;importflash.text.TextField;importflash.text.TextFormat;importflash.text.TextFormatAlign;publicclassTimerextendsSprite{privatevar_text:TextField;privatevar_value:int;publicfunctionTimer(){_text =newTextField();_text.defaultTextFormat =newTextFormat("Verdana",20,0xFF0000,true,null,null,null,null, TextFormatAlign.LEFT);_text.width =200;_text.selectable =false;_text.multiline =false;addChild(_text);_value =30;_text.text ="Time: "+ timeString();}privatefunctiontimeString():String{varminutes:int= _value /60;varseconds:int= _value %60;returnminutes.toString() +":"+ seconds.toString();}publicfunctionaddToTime(value:int):void{_value += value;_text.text ="Time: "+ timeString();}}}
_value will be the time left in the game in seconds. Now the code to add the timer, in GameScreen.as:There are no explanations needed in the code, so hit the compile button and take a look at your timer!
privatevar_timer:Timer;publicfunctionGameScreen(){_background =newBackgroundImage();_background.x =275;_background.y =200;addChild(_background);_blocksOnScreen =newVector.<LetterBlock>(8);populateBlocks();_wordBox =newWordBox();_wordBox.x =275;_wordBox.y =350;addChild(_wordBox);_score =newScore();_score.x =25;_score.y =210;addChild(_score);_timer =newTimer();addChild(_timer);addEventListener(Event.ADDED_TO_STAGE, onStage);ComboHandler.dispatcher.addEventListener(ComboEvent.COMBO_FINISHED, onWordFinished);ComboHandler.setGameInstance(this);}
Step 15: Decreasing and Increasing the Time Left
As discussed in the previous step, the timer needs to be constantly updated. This is because it is constantly decreasing, second by second. Also, we should award the player more seconds when a word is successfully completed, and take away some time when a word is mistyped. Inside GameScreen.as:Lines 1, 27, 29 and 33 create the timer, put it on the screen and add an event listener for
privatevar_updateTimer:Number;publicfunctionGameScreen(){_background =newBackgroundImage();_background.x =275;_background.y =200;addChild(_background);_blocksOnScreen =newVector.<LetterBlock>(8);populateBlocks();_wordBox =newWordBox();_wordBox.x =275;_wordBox.y =350;addChild(_wordBox);_score =newScore();_score.x =25;_score.y =210;addChild(_score);_timer =newTimer();addChild(_timer);addEventListener(Event.ADDED_TO_STAGE, onStage);addEventListener(Event.ENTER_FRAME, gameLoop);ComboHandler.dispatcher.addEventListener(ComboEvent.COMBO_FINISHED, onWordFinished);ComboHandler.setGameInstance(this);_updateTimer =0;}privatefunctiongameLoop(e:Event):void{ComboHandler.update();_updateTimer +=1/30;if(_updateTimer >=1){_updateTimer -=1;_timer.addToTime(-1);}}privatefunctionremoveSelectedLetters(wasFromFailure:Boolean):void{vari:int;varcount:int=0;for(i =0; i <8; i++){if(_blocksOnScreen[i].selected){count++;if((wasFromFailure && Math.random() <0.3) || !wasFromFailure){removeChild(_blocksOnScreen[i]);_blocksOnScreen[i] =null;}else{_blocksOnScreen[i].select();}}}if(wasFromFailure){_score.addToScore( -(count *10));_timer.addToTime( -count);}else{_score.addToScore(count *30);_timer.addToTime(count *2);}}
Event.ENTER_FRAME. This listener will add 1/30 of a second to _updateTimer on each frame (we’re assuming here that the game is running at 30 fps. If it’s running at 24 fps, for example, it should add 1/24 of a second). When _updateTimer reaches one or more than one second, 1 is decreased from the timer’s value. In lines 84 and 89, we decrease and increase time, respectively, based on whether the player has formed an “acceptable” word or not.Also, when the user mistypes a word, an amount of seconds equal to the number of letters is decreased from the game timer. If a word is correct, the game awards twice the number of letters as seconds for the player.
This is your result:
Step 16: Improve our Random Letter Creation Process
In the current game, sometimes too few vowels appear on the screen. That makes it extremely hard to create words. In this step, we’ll change that. The solution is extremely simple: we will use an array based on weight.This array contains all the letters from the alphabet and we will get a letter by accessing a random index within the array’s limits. However, the “weight” of each letter will be different. The “weight” is simply the number of letters in the array, so if the letter “R” has weight 2, for instance, there are two “R”s in the array. Looking from a probabilistic perspective, the more number you have of a letter, the higher your chance of accessing it.
The code will certainly help explain it. This code should be placed inside GameScreen.as:
In line 1, you can see the array of letters. Each vowel has weight 3, which means there are always 3 of them, and the letter “R” has weight 2. This is an extremely simplified array, but a lot more could be done with its idea.
privatevar_letters:Array= ["A","A","A","B","C","D","E","E","E","F","G","H","I","I","I","J","K","L","M","N","O","O","O","P","Q","R","R","S","T","U","U","U","V","W","X","Y","Z"];privatefunctionrandomLetter():String{return_letters[int(Math.random() * _letters.length)];}
Here’s another way of putting it that makes the relative weights clearer:
Although not really “visible”, you can check the compiled project below:
privatevar_letters:Array= ["A","A","A","B","C","D","E","E","E","F","G","H","I","I","I","J","K","L","M","N","O","O","O","P","Q","R","R","S","T","U","U","U","V","W","X","Y","Z"];privatefunctionrandomLetter():String{return_letters[int(Math.random() * _letters.length)];}
Step 17: Preloader Create the Graphics
Right now, the base of our game is complete. We will now add a preloader and a game over screen over the next steps. First of all, we need to create the preloader graphics. This will just be a rounded square bar with “Loading” written in it. You can grab the source files to get it.
Step 18: Preloader Write the Code
If you are familiar with FlashDevelop, this will not be difficult. We will modify thePreloader class to put our graphics in there. Jumping to the code:In the
importArtAssets.LoadingImage;importflash.display.Sprite;// *** snip ***privatevar_loadingImage:LoadingImage;privatevar_loadingMask:Sprite;publicfunctionPreloader(){if(stage) {stage.scaleMode = StageScaleMode.NO_SCALE;stage.align = StageAlign.TOP_LEFT;}addEventListener(Event.ENTER_FRAME, checkFrame);loaderInfo.addEventListener(ProgressEvent.PROGRESS, progress);loaderInfo.addEventListener(IOErrorEvent.IO_ERROR, ioError);_loadingImage =newLoadingImage();_loadingImage.x =275;_loadingImage.y =200;addChild(_loadingImage);_loadingMask =newSprite();_loadingMask.x =75;_loadingMask.y =175;_loadingImage.mask = _loadingMask;}privatefunctionprogress(e:ProgressEvent):void{_loadingMask.graphics.clear();_loadingMask.graphics.beginFill(0x000000);_loadingMask.graphics.drawRect(0,0, _loadingImage.width * (e.bytesLoaded / e.bytesTotal),50);_loadingMask.graphics.endFill();}privatefunctionloadingFinished():void{removeEventListener(Event.ENTER_FRAME, checkFrame);loaderInfo.removeEventListener(ProgressEvent.PROGRESS, progress);loaderInfo.removeEventListener(IOErrorEvent.IO_ERROR, ioError);removeChild(_loadingImage);_loadingImage.mask =null;_loadingImage =null;_loadingMask =null;startup();}
Preloader constructor, we created an instance of the loading image inside the .swc file, as well as a sprite that will be used as a mask. This mask will create the visual representation of the “loading” process.The
progress() function is the key function here: in it we update the mask by creating a rectangle of width e.bytesLoaded / e.bytesTotal times the width of the loading bar image. The bytesLoaded and bytesTotal properties of the ProgressEvent class show us how many bytes from the game have been loaded, and what are the total bytes. That way, by diving them we get the percentage of the game loaded.In the
loadingFinished() function, we have to clear every reference to the loading image and its mask. That way they can be garbage collected and will no longer use the memory reserved for the game.Take a look at the preloader working!
Step 19: Game Over Screen Create the Graphics
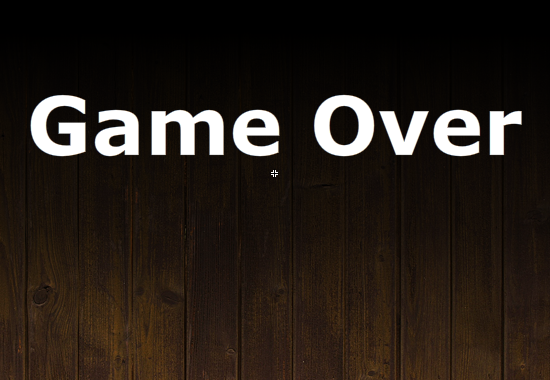
Now we need to work on the game over screen. I wanted it to be very simple, only to show how to add a screen when the game has finished. The graphics are very simple: the same game background with a “Game Over” text and a fading animation. You can see the middle of the animation below:
Step 20: Game Over Screen Write the Code
It is time now to add the game over screen in the game. Before doing that, we will need to have a way to know when the timer reaches 0 (which means game over). In order to do that, a getter function in Timer.as must be created:With that, we can now create the
publicfunctiongetvalue():int{return_value;}
GameOverScreen class:The code inside
package{importArtAssets.GameOverScreenImage;importflash.display.Sprite;importflash.events.Event;publicclassGameOverScreenextendsSprite{privatevar_image:GameOverScreenImage;publicfunctionGameOverScreen(){_image =newGameOverScreenImage();_image.x =275;_image.y =200;addChild(_image);addEventListener(Event.ENTER_FRAME, update);}publicfunctionupdate(e:Event):void{if(_image.currentFrame == _image.totalFrames){_image.stop();}}}}
update() was created to allow the animation to play only once. That way, the fade in effect will not loop.Going to Main.as, add this code:
This code will be called by
privatevar_gameOverScreen:GameOverScreen;publicfunctiongameOver():void{removeChild(_gameScreen);_gameOverScreen =newGameOverScreen();addChild(_gameOverScreen);}
GameScreen when it detects that the game was lost. Now, inside GameScreen.as:The highlighted lines are the only change to this function. They will detect when the timer has reached less than 0 and whether it still has a parent (which means it wasn’t removed by
privatefunctiongameLoop(e:Event):void{ComboHandler.update();_updateTimer +=1/30;if(_updateTimer >=1){_updateTimer -=1;_timer.addToTime(-1);}if(_timer.value <0&& parent){Main(parent).gameOver();}}
Main yet). At this point, it will call the gameOver() function of Main.Compile the project, let the timer reach 0 and see what you get:
Conclusion
Great job — you’ve created a basic yet full typing game! What’s next? I suggest you try making a better timer, adding block letter transitions, and adding more effects. source: CLICK ME

No comments:
Post a Comment